Lead Generation Bot
As a marketing strategy, every website visitor is the prospective customers. A Chatbot can be a great way to engage with customers visiting on your website, note their interests and generate leads.
AmplifyReach Chatbot provides ready to use Lead Generation Bot. You can select the details to be collected from customers, and you are ready to go live in few minutes!
Steps to install lead bot in 3 simple steps!
- Install
Login to AmplifyReach Dashboard -> Goto Pre-built bots. Select Lead Generation bot -> Install
2. Configure
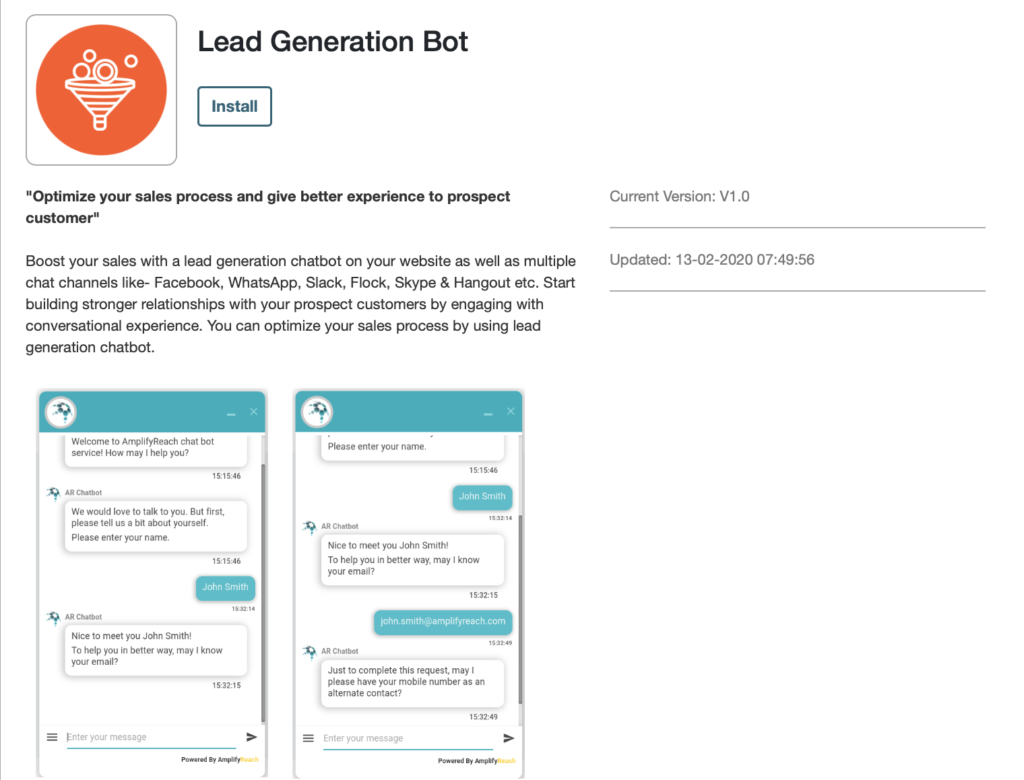
Select Lead Fields. These indicate the information to be collected from the lead. As you select fields like name, email, contact number the right panel shows preview of questions added in the sample chatbot window. Select Next.

Now you can edit the message displayed while asking the data from the customer. You can also drag and drop the boxes to change the order of questions.

You can chose to send email notification that the new lead is received. Please specify email id of sales representative where the notification will be sent. You can also set notification message to be sent to the lead.

3. Deploy
Select Deploy. Your bot is ready to test! You can test it using the link given on screen. Your deployment is ready under Dashboard -> Deployment. To check how to deploy the bot on website, please refer article How to install the chatbot on your website
Contact App
You can see the leads generated by the chatbot in AmplifyReach Dashboard -> Contacts. It shows the lead information like name, email. You can also check the recent chats of the lead using  option.

Customising the Lead Bot
In case you need to customise your lead bot, you can go to Dashboard -> Build Bots. Your newly installed bot will be displayed as “Prebuilt: Lead Generation bot” conversation.

You can open the conversation and change the flow as per requirement. The updated bot needs to be re-deployed from the deployment page.