Adding Conversation Nodes
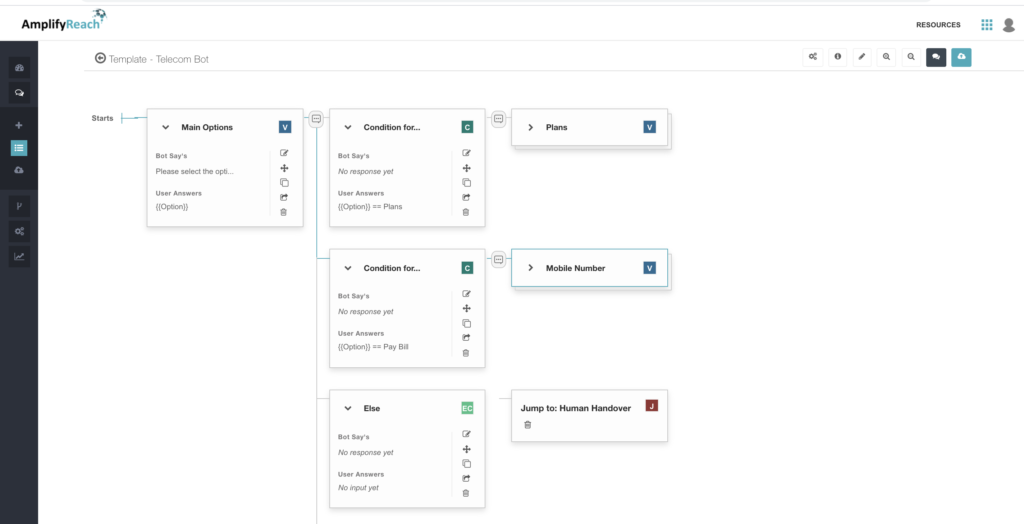
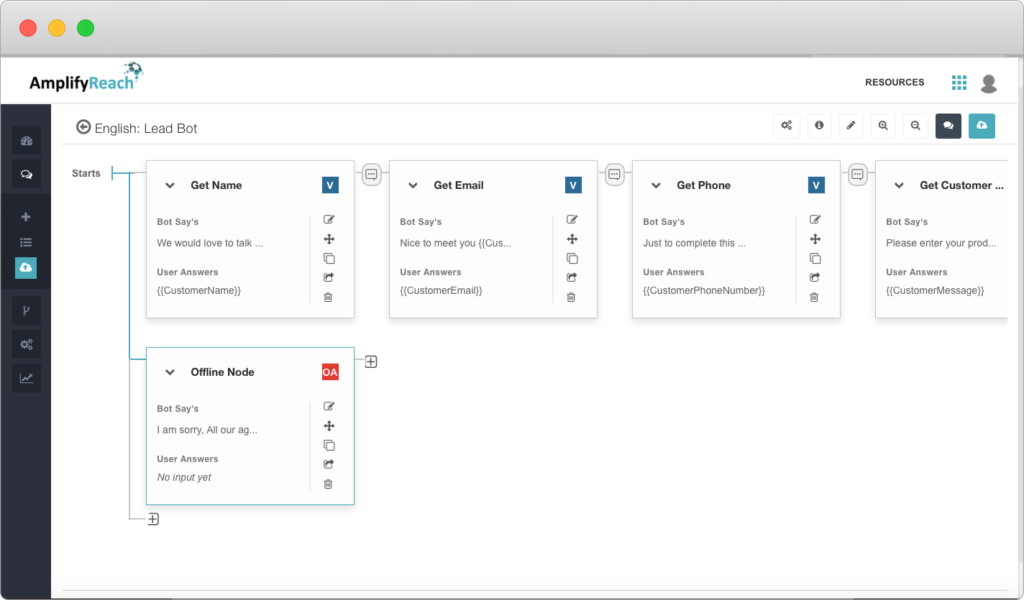
The conversation is built by creating the sequence of nodes in the bot builder. It can be built as a flowchart of the workflow.
Each node indicates one or more steps in the conversation. For example, a node can show message and accept input from user.
- Message
- Input Parameter
- Condition/ Else Condition
- Assignment
- Intent Detection
- Knowledge base
- Marker
- Offline Agent
- Fallback
- Conversation Jump
- Debug
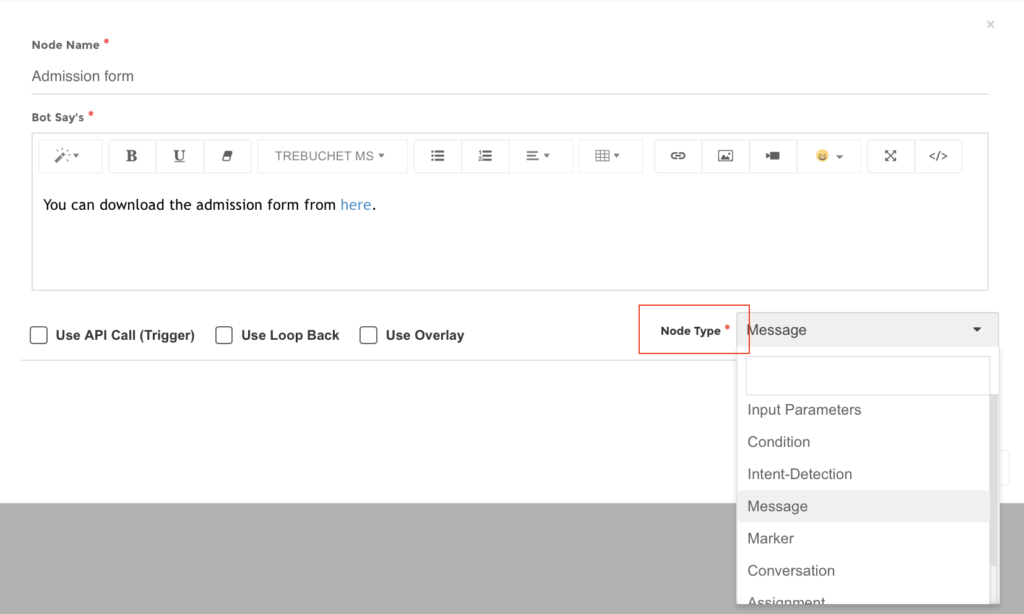
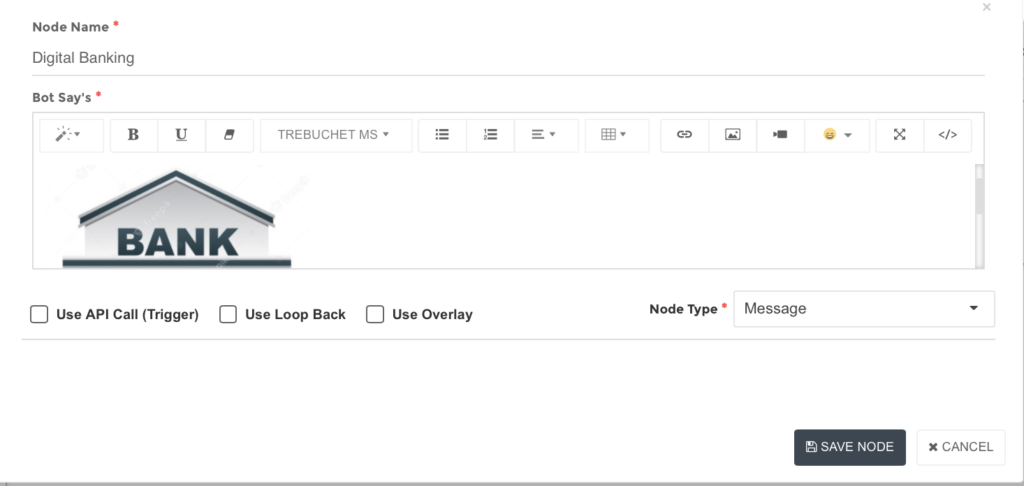
Message Node
A message node is used to display information to the user. The message node has text editor. You can enter plain text or copy rich html content having images, videos and links, or it can show data fetched from backend system. You can extend the editor area by using  button. If required the bot builders can make use of </> tag to edit html code.
Input Parameter Node
You can accept user input using Input Parameter node. It is generally combined with a message. You can use multiple type of inputs like text, date, entity, and Rich UI controls. To know more about input parameters, please refer Accepting user input.

Condition Node
The condition node is used compare a variable with value and decide the further flow. Multiple conditions can be added with AND / OR operators.
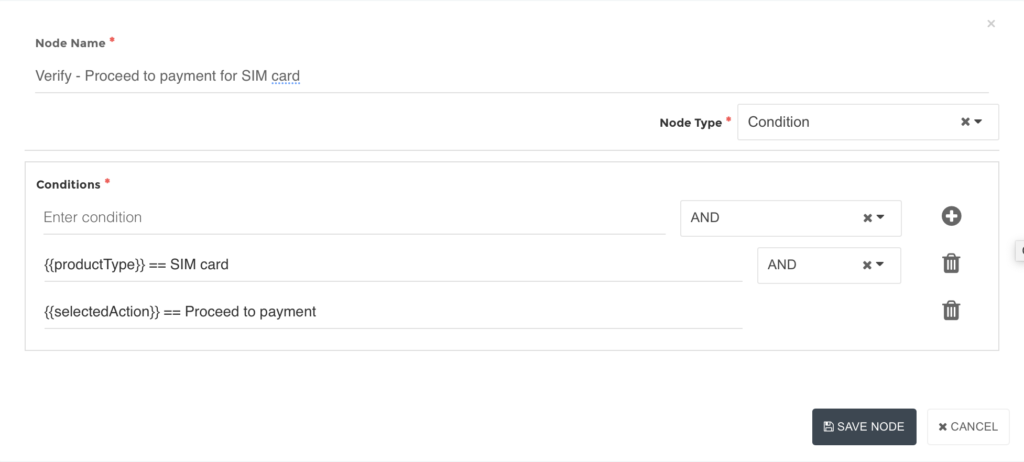
You can add multiple condition nodes one below another. Each condition will start different flow associated to it.. You can also set Else-Condition as the default condition to handle default flow.
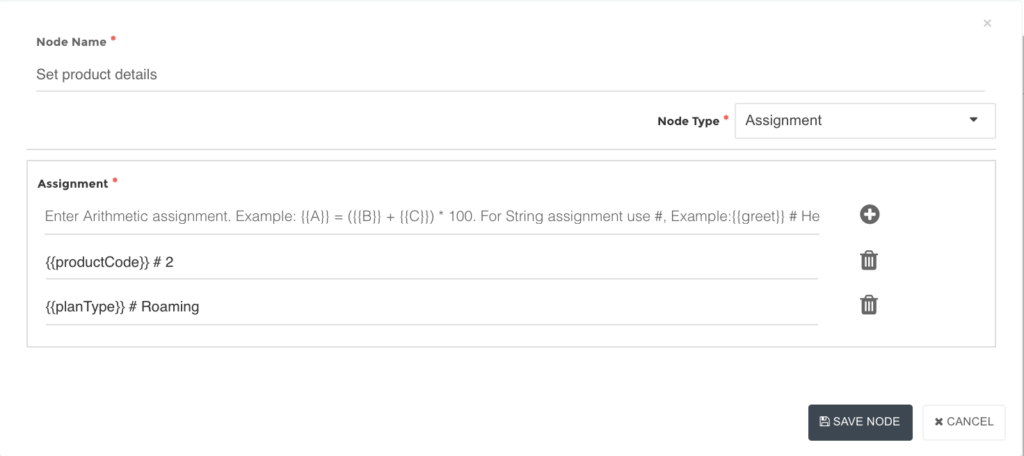
Assignment Node
Assignment node is used to set a value to a variable.
Bot will create a new variable if it is not found, else it will overwrite the existing value. Please note, assignment is done using “#” operator.
In following example the bot will create new or overwrite following:
productCode = 2 and
planType = Roaming
Intent Detection Node
You can add intents in the bot to detect intents from human conversation. The intent needs to be placed at zeroth
To know more, please refer Making Chatbot Interactive using Intents
Knowledge Base Node
You can set knowledge base in conversation to detect and answer FAQs. To know more about using knowledge base in conversation please refer How to add FAQs?
Marker Node
You can tag the conversation flows with the help of marker. This is helpful for analytics to identify exact number of execution of particular flow in selected period. To know more about markers please refer How to add a marker in conversation?
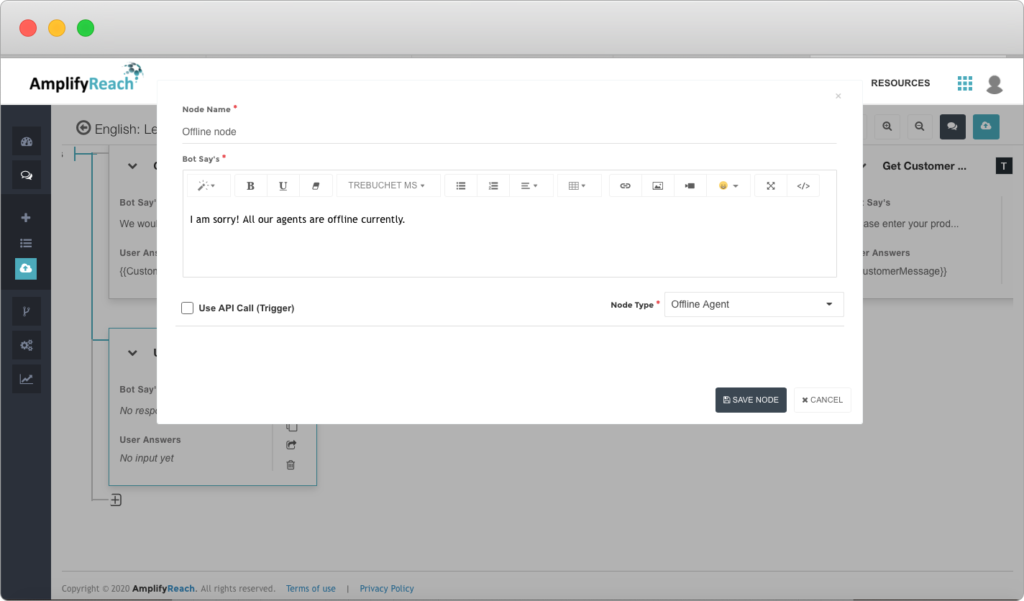
Offline Agent Node
In case Human Agents are not working 24×7, you can configure an offline message to display in the bot. It will be displayed to the end user if chat needs to be transferred, but no agent is available to accept the chat.
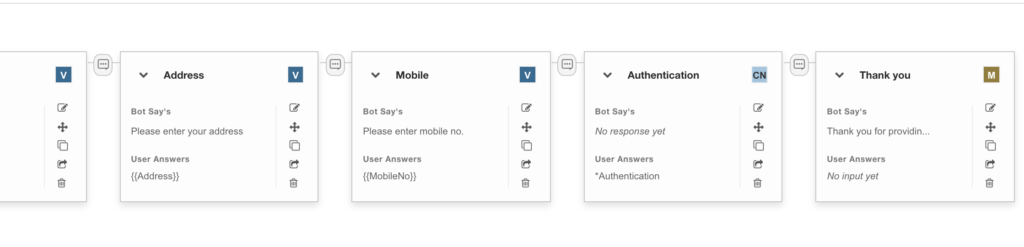
To set up an offline message, add a node in conversation just below the first node. Select the node type as Offline Node. Please note that Offline node should be at the level zero, just below the first node as shown in screenshot.
Select Offline Agent Node from Node type and add below the Intent node Enter the message details per your chatbot
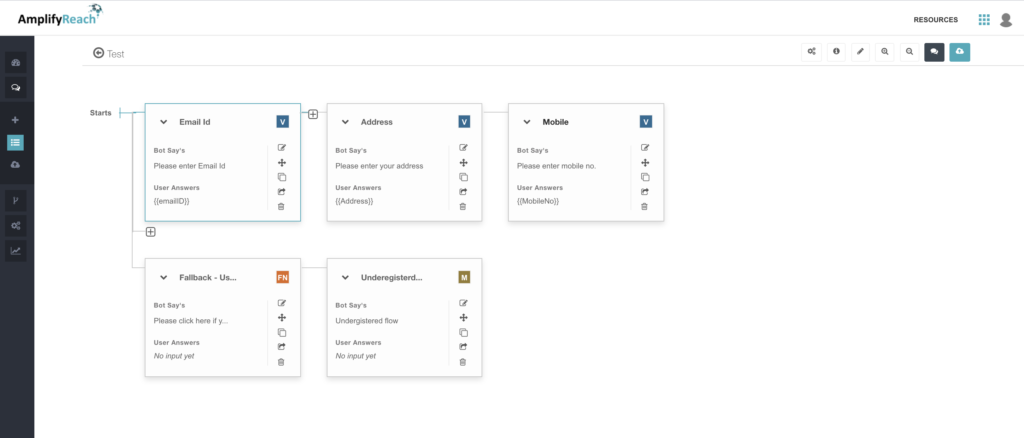
Fallback Node
You can set fallback flow for exceptions where user does not have required data. For example, while accepting email, you can set a fallback flow if user mentions he does not have the expected details.
You need to add a fallback node at zero level – just below first node by clicking the + sign under it.
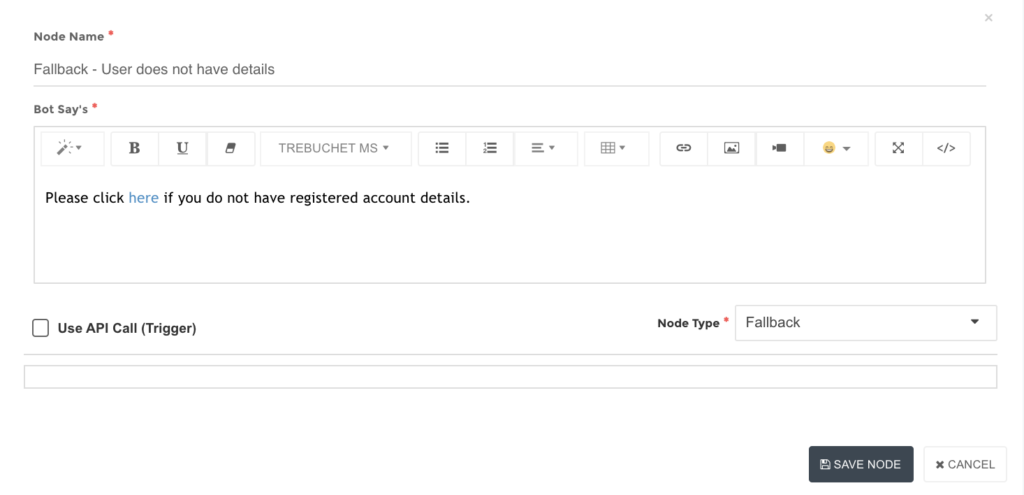
The fallback node is indicated by  as shown below.
Conversation Jump Node
As you go on adding multiple flows in the conversation, it may get lengthy. In such case, you can split the conversation in different conversations. You can use the “Conversation” node type to jump to other conversation, finish it and continue the current flow. This can also be used to re-use flows in the conversation.
Debug Node
The debug node is used for developer/test mode to display information in tryout. Please note, the message shown in debug mode is only seen in tryout. This is used to add notes in conversation those are not seen to the end user. For example, you can print the API JSON/XML response in debug mode for internal usage in Tryout, but do not show to end users after deployment.