How to add a Marker
What are Markers?
Markers are tags in the conversation, which reflect in Analytics. These are reflected in Bot Report to identify the exact number of execution of particular flow.
For example. A travel chatbot can have following flows:
- Book Flight,
- Flight Status,
- Enquiry.
You can tag these conversation with a Marker. Eg. If you insert a maker “Book Flight”, it will be reflected in a Bot Report with the same name. This helps to categorise the conversations in Report, and get a close look at a number of conversations using marker name.
How to add a Marker in conversation?
Chatbot reports calculate using start and end markers. You can add one or more markers in a single chatbot conversation. A marker will be counted only if the start and end of the marker is hit in the same chat session. You can assign a suitable name to the marker which will reflect in bot report.
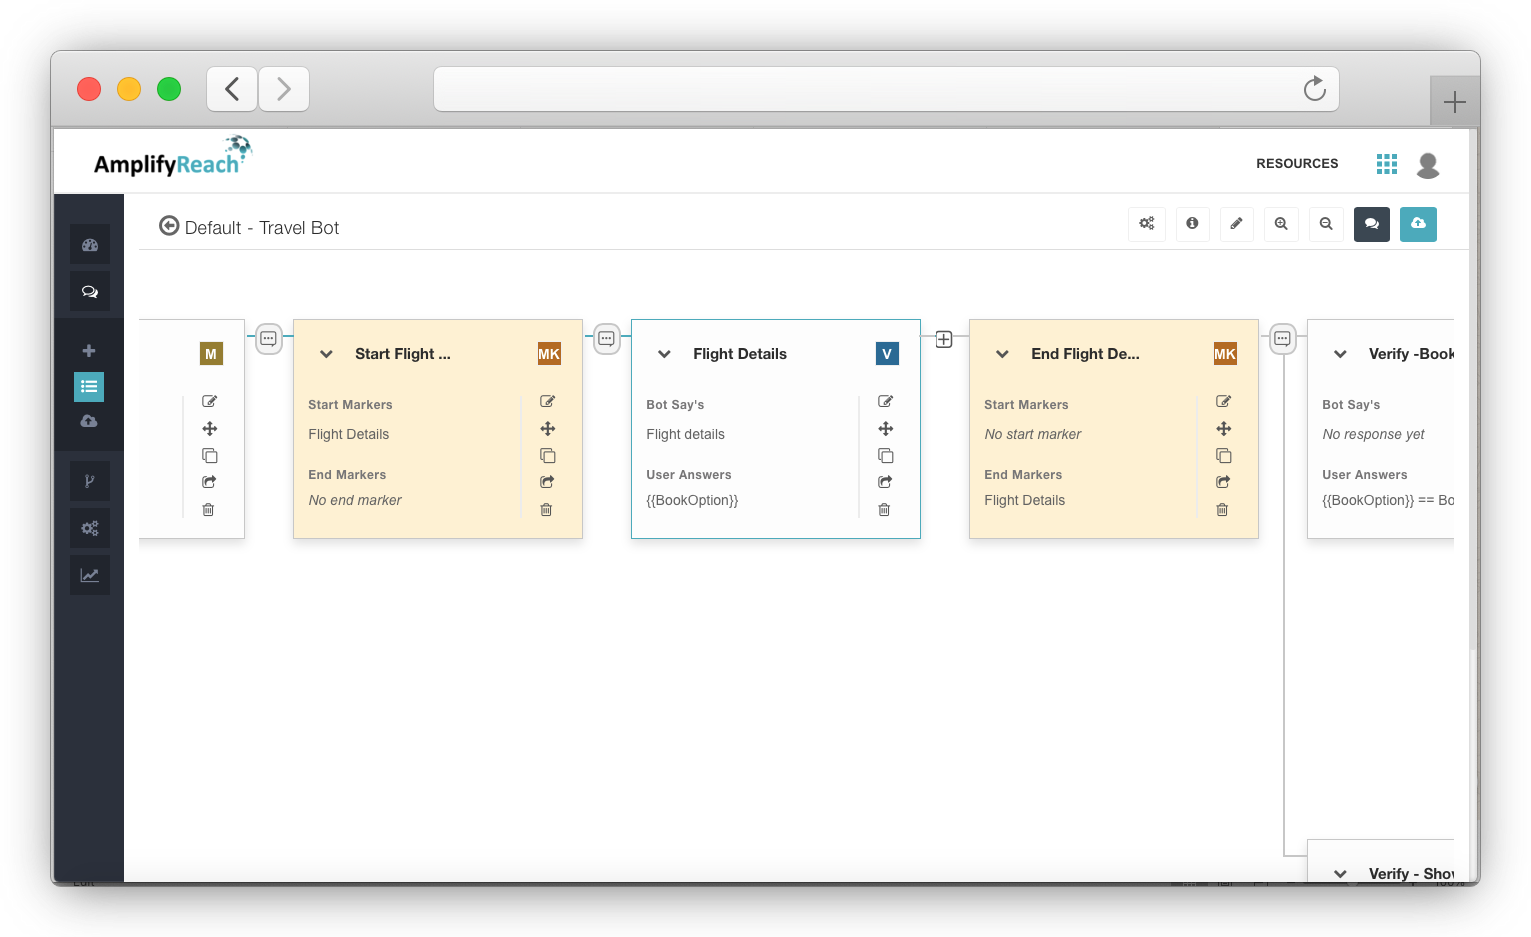
For example in Travel Bot, we will add a marker in Flight Details point. This will reflect in bot report – how many times this flow got executed.
- Add a node just before Flight Details node is executed.
- Select node type as Marker
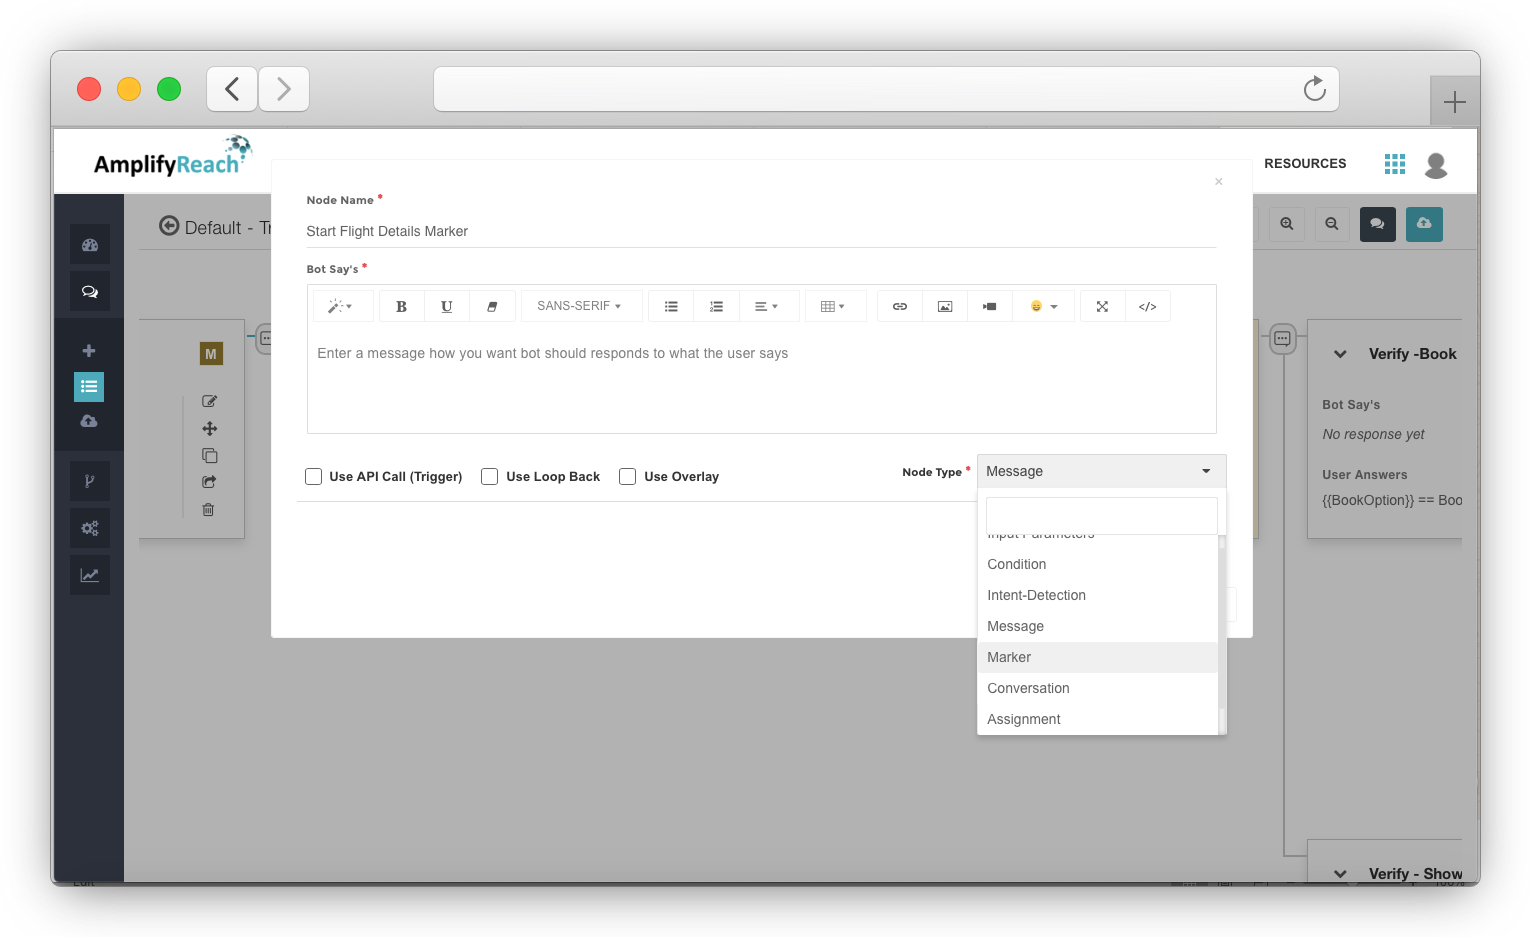
- Set any name to node name e.g. “Start Flight Details Marker”.
- Select checkbox “Start Marker” to indicate this is start of marker.
- Set the name in the “Start Markers” section. Note, this name will be reflected in bot report
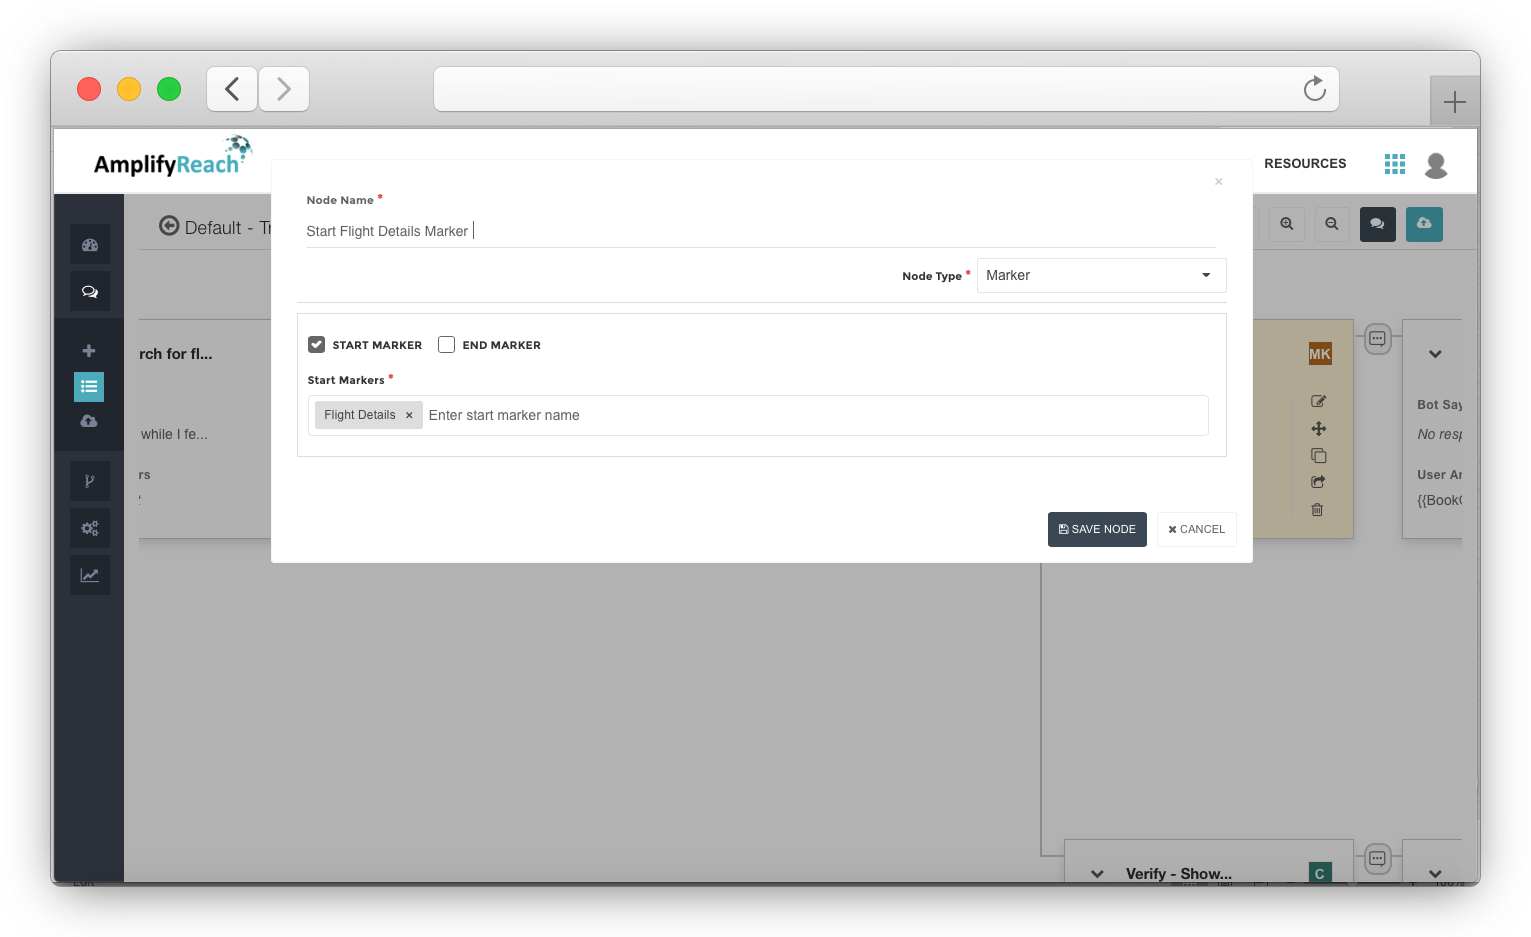
- The marker will be shown in conversation as follows.
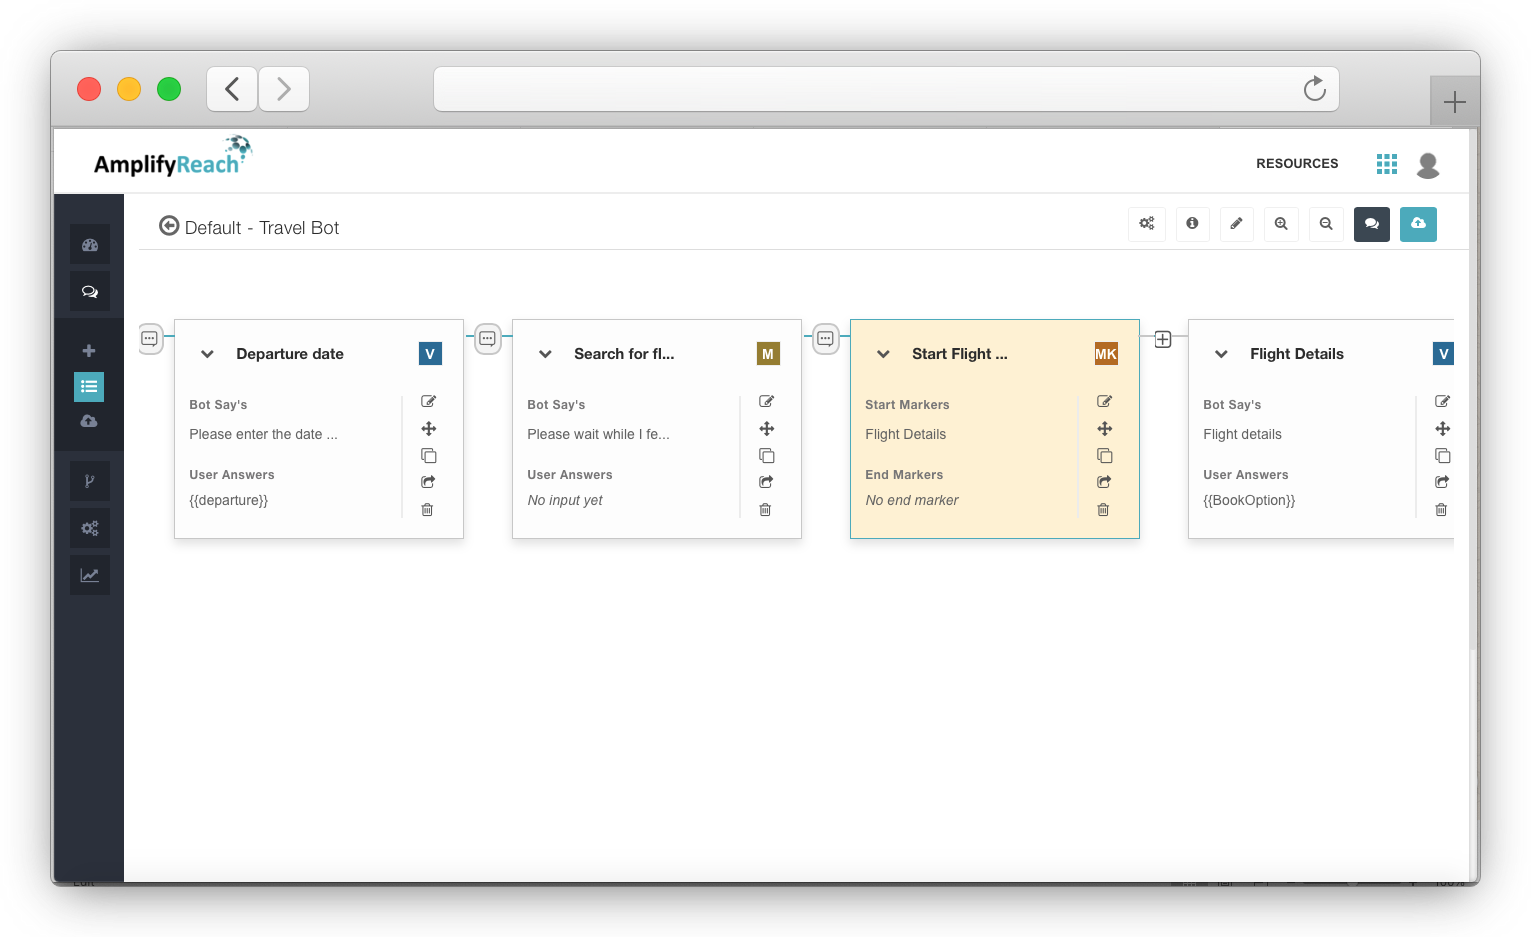
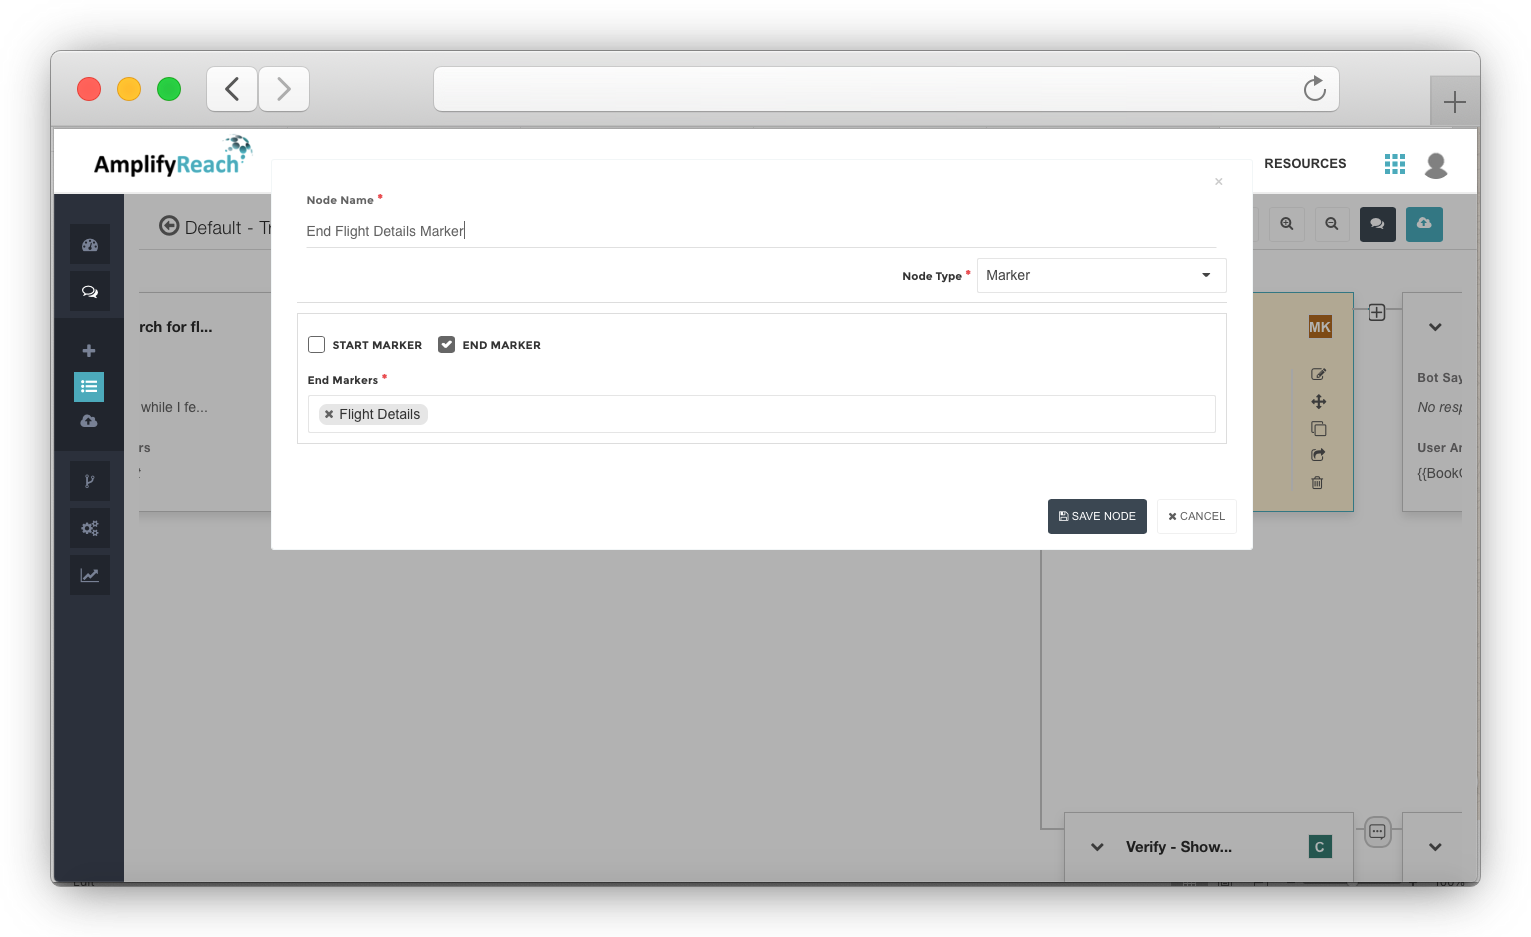
- Add a new node just after Flight Details node. Select node type as Marker
- Set name as End Flight Details Marker.
- Select the exact same name that you had set in the start marker. This needs to be matched to indicate flow of marker got completed. The entry will be created in bot report only on matching start and end marker condition.
- Deploy and test your conversation.
- You will be able to see the newly added marker in the bot report.